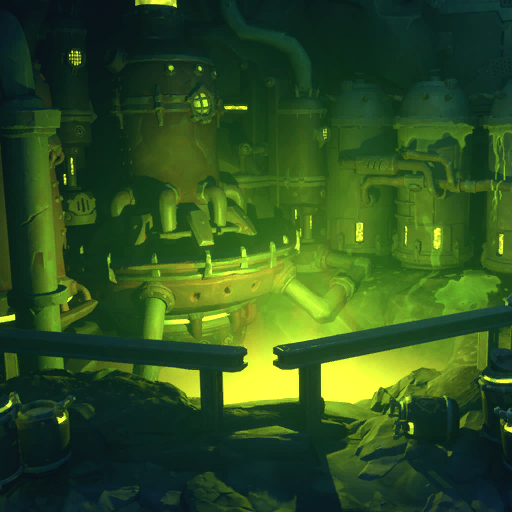
Expedition: Bal Duum
| Expedition: Bal Duum | |
|---|---|

| |
| Category | Lost Zone |
| Type | Expedition |
| Region | The Deep |
| Area | Bal Duum |
Expedition: Bal Duum is a Lost Zone expedition in The Deep.
An ancient mine nestled deep in the woods, Bal Duum was feared even before the Fall. The Woodwen people claimed it was a cursed place, and while the settlers of Deepwood Holt never shared their superstitions, the Balgrim infestation was enough for them to keep their distance. Now, it seems, the heart of Aturach’s warbear lies somewhere within. One would expect it to be well defended.
How to Unlock[edit]
Accessed during The Devil You Know
Rewards[edit]
| Echoes | ||
|---|---|---|
| Name | Quality | |
| Placeholder Echo | Any | |
| Materials | ||
|---|---|---|
| Name | Quality | |
| Common | ||
| Common | ||
| Common | ||
| Common | ||
| Common | ||
| Common | ||
| Epic | ||
| Rare | ||
| Rare | ||
| Rare | ||
| Rare | ||
| Rare | ||
| Accessories | ||
|---|---|---|
| Name | Quality | |
| Placeholder | ||
| Weapons | ||
|---|---|---|
| Name | Quality | |
| Placeholder | ||
| Armors | ||
|---|---|---|
| Name | Quality | |
| Placeholder | ||
| Style | ||
|---|---|---|
| Name | Quality | |
| Placeholder | ||
| Housing | ||
|---|---|---|
| Name | Quality | |
| Placeholder | ||
| Crafting | ||
|---|---|---|
| Name | Quality | |
| Placeholder | ||
Possible Treasure Chest types to spawn here:
Treasure Chests
Treasure Chests can be found across Evenor and within Lost Zones, and give various rewards.
Skeleton Chest

Skeleton Chests are a specific kind of treasure chest found in Lost Zone areas. These chests require a Skeleton Key to open.
Soulbound Chest

Soulbound chests, when approached, will lock themselves with green spectral chains and spawn enemies within a small radius in front of them. The chest will unlock once all soulbound enemies have been defeated, which are marked with chains glowing near their feet.
Enemies[edit]
 Shrike Skirmisher
 Shrike Enforcer
 Deadeye Shrike
 Shrike Sentry
 Balgrim
 Balgrim Sapper
 Balgrim Digger
 Balgrim Beacon
 Plague Keeper
 Deceiver
 Crystal Phoenix
 Ichor
Ichor Ichorling
 Gilded Ichor
 Gilded Ichorling
 Hobgoblin
 Stomper
 Elder Monstrosity
 Pridelord
 Harbringer
 Glittergreed
 Baltoad
 Bloodbag
 Wurm
Wurm Emissary
 Oracle
 Seer
Seer Herald
 Wretch
 Foul Wretch
 Husk
Husk
Events[edit]
Altar of the Phoenix
The Altar of the Phoenix is an Event found in all Lost Zones. Interacting with the altar will summon a phoenix that must be defeated to earn rewards. The type of phoenix and mechanics of the event differ depending on the zone. It is possible that applying the Phoenix Eggs mutator (Greed + Solar) makes it more likely for the altar to appear in the Lost Zone.
The Crystal Phoenix does not respawn like the other Phoenixes. After activating the altar, players must defeat the Crystal Phoenix as quickly as possible within two and a half minutes. The Crystal Phoenix is considerably more durable than the Loot Phoenix. Four of the altar's rings will be lit with a pillar of white fire, indicating the remaining reward. Every 30 seconds, one of the fire pillars will extinguish, reducing the reward. The event ends when the phoenix is defeated or the timer expires.
Deception
The Deception is group of four chests. The goal of the event is to pick the two chests without deceivers hiding inside. Hints to those chests are:
- In the distance deceivers can be seen hiding in their chests
- Close by the deceiver chests can move around
Failing means to confront both deceivers in combat.
Gloom Ambush
A Gloom ambush will always occur at least once during a Lost Zone expedition and, in most cases, cannot be bypassed. The ambush takes place in certain rooms which will have a Memory Fragment in the center. Picking up or passing the fragment will seal the exits and initiate the event. Players outside of the ambush can pass through the one-way barriers into the room.
Loot Goblin
The Loot Goblin is a special enemy unique to its own event in a Lost Zone. The Loot Goblin is a goblin toting a large overflowing treasure chest on its back, and it is always first encountered rummaging through an already opened treasure chest with a pile of treasure in front of it. Defeat the goblin before it escapes, and its spoils are yours for the taking. As the Loot Goblin is an icon of greed and avarice, it is arguably more likely it will appear if applying a Greed Imbuement to the Lost Zone.
Trickster Events
Trickster events are found in all Lost Zones. There are 3 variants of these luck based mini games. A player can interact with Trickster's Game multiple times per encounter. All variants share, that the wayfinder has a limited amount of attempts to get the grand price, various loot and some of the Trickster's Coins. Group members can either get the same price by staying in close proximity while the game is played, or simply open the last chest for free at a later time.
Chain Gang
The Chain Gang is forced to work on a mineral patch. The event is completed by defeating their captors and interacting with them. There can be several groups with chain gangs all over the expedition.
The event exists within a quest but can be repeated as a event without quest objectives.
Mass Deception
The Hunted
The Hunted starts when encountering any of the involved Pridebound Stomper in Bal Duum. The wayfinders must traverse and fight up their way to the top of the lair to slay the Pridelord.
What Lies Beneath
What Lies Beneath starts when encountering a party of Balgrim bandits gathered around a drill. Defeating this mob will grant access to the drill containing Archaic Bone.
