Expedition: The Pit
| Expedition: The Pit | |
|---|---|

| |
| Category | Lost Zone |
| Type | Expedition |
| Region | The Deep |
| Area | The Pit |
Expedition: The Pit is a Lost Zone expedition in The Deep.
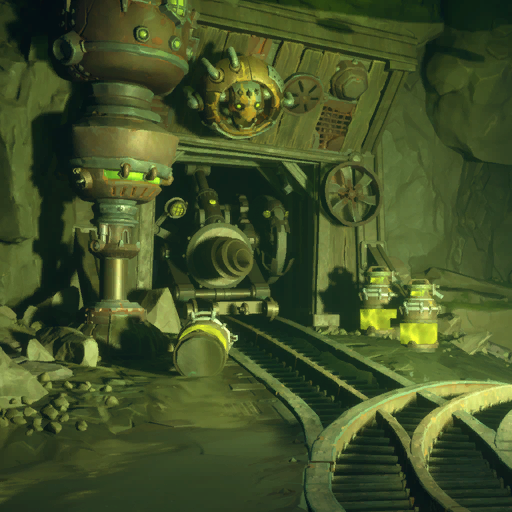
Before the Gloomfall, Bal Mol thrived as Godsblood mine. Its record for dangerous accidents became so notorious, it was eventually nicknamed “The Pit.” The Shrike Syndicate moved in shortly after The Fall. One would expect heavy resistance.
How to Unlock[edit]
Accessed during Into the Pit
Rewards[edit]
| Echoes | ||
|---|---|---|
| Name | Quality | |
| See Enemy List Below | Any | |
| Materials | ||
|---|---|---|
| Name | Quality | |
| Common | ||
| Common | ||
| Common | ||
| Common | ||
| Common | ||
| Common | ||
| Uncommon | ||
| Uncommon | ||
| Uncommon | ||
| Placeholder | ||
| Placeholder | ||
| Placeholder | ||
| Placeholder | ||
| Placeholder | ||
| Placeholder | ||
| Rare | ||
| Rare | ||
| Rare | ||
| Rare | ||
| Rare | ||
| Accessories | ||
|---|---|---|
| Name | Quality | |
| Placeholder | ||
| Weapons | ||
|---|---|---|
| Name | Quality | |
| Placeholder | ||
| Placeholder | ||
| Placeholder | ||
| Placeholder | ||
| Placeholder | ||
| Potions | ||
|---|---|---|
| Name | Quality | |
| Placeholder | ||
| Placeholder | ||
| Placeholder | ||
| Placeholder | ||
| Placeholder | ||
| Placeholder | ||
| Placeholder | ||
| Armors | ||
|---|---|---|
| Name | Quality | |
| Placeholder | ||
| Style | ||
|---|---|---|
| Name | Quality | |
| Placeholder | ||
| Housing | ||
|---|---|---|
| Name | Quality | |
| Placeholder | ||
Possible Treasure Chest types to spawn here:
Treasure Chests
Treasure Chests can be found across Evenor and within Lost Zones, and give various rewards.
Skeleton Chest

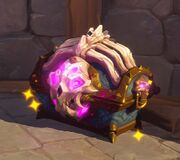
Skeleton Chests are a specific kind of treasure chest found in Lost Zone areas. These chests require a Skeleton Key to open.
Soulbound Chest

Soulbound chests, when approached, will lock themselves with green spectral chains and spawn enemies within a small radius in front of them. The chest will unlock once all soulbound enemies have been defeated, which are marked with chains glowing near their feet.
Enemies[edit]
Events[edit]
Altar of the Phoenix
The Altar of the Phoenix is an Event found in all Lost Zones. Interacting with the altar will summon a phoenix that must be defeated to earn rewards. The type of phoenix and mechanics of the event differ depending on the zone. It is possible that applying the Phoenix Eggs mutator (Greed + Solar) makes it more likely for the altar to appear in the Lost Zone.
The Crystal Phoenix does not respawn like the other Phoenixes. After activating the altar, players must defeat the Crystal Phoenix as quickly as possible within two and a half minutes. The Crystal Phoenix is considerably more durable than the Loot Phoenix. Four of the altar's rings will be lit with a pillar of white fire, indicating the remaining reward. Every 30 seconds, one of the fire pillars will extinguish, reducing the reward. The event ends when the phoenix is defeated or the timer expires.
Deception
The Deception is group of four chests. The goal of the event is to pick the two chests without deceivers hiding inside. Hints to those chests are:
- In the distance deceivers can be seen hiding in their chests
- Close by the deceiver chests can move around
Failing means to confront both deceivers in combat.
Gloom Ambush
A Gloom ambush will always occur at least once during a Lost Zone expedition and, in most cases, cannot be bypassed. The ambush takes place in certain rooms which will have a Memory Fragment in the center. Picking up or passing the fragment will seal the exits and initiate the event. Players outside of the ambush can pass through the one-way barriers into the room.
Loot Goblin
The Loot Goblin is a special enemy unique to its own event in a Lost Zone. The Loot Goblin is a goblin toting a large overflowing treasure chest on its back, and it is always first encountered rummaging through an already opened treasure chest with a pile of treasure in front of it. Defeat the goblin before it escapes, and its spoils are yours for the taking. As the Loot Goblin is an icon of greed and avarice, it is arguably more likely it will appear if applying a Greed Imbuement to the Lost Zone.
Trickster Events
Trickster events are found in all Lost Zones. There are 3 variants of these luck based mini games. A player can interact with Trickster's Game multiple times per encounter. All variants share, that the wayfinder has a limited amount of attempts to get the grand price, various loot and some of the Trickster's Coins. Group members can either get the same price by staying in close proximity while the game is played, or simply open the last chest for free at a later time.
Excavation Unit
The Excavation Unit , a massive chain driven drill, will trigger the quest when approached. The spinning drill head is lethal to Wayfinders that stand in its way whilst it is actively mining.
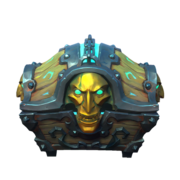
The drill will progress through one wall per charge of fuel, which is found somewhere in the room the drill stops, guarded by a large group of Shrikes. The fuel cell is found inside a Godsblood Chest which is visually distinct to other chests in the region. It is not always mandatory to clear all enemies to unlock the chest but you may find you cannot open the chest till a certain percentage of enemies are cleared.
Slime Sabotage
The Slime Sabotage starts when encountering lone Corroded Ichor. Defeating this mob will drop 1 of the parts required to start the Machine.
Objectives[edit]
- 1. Defeat the slime and claim the part it's carrying.
- 2. Locate and defeat the other slime to retrieve the other part.
- 2a. Load Parts into Machine.
- 3. Inject
 Godsblood into the Machine.
 - 4. Defeat the Boss Ichor Vaelor
