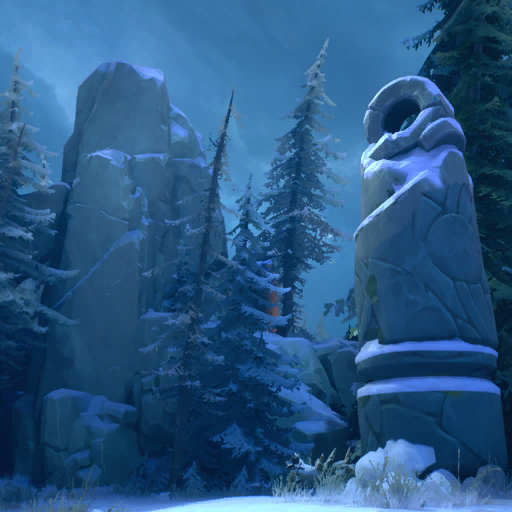
Expedition: The Shrouded Woods
| Expedition: The Shrouded Woods | |
|---|---|

| |
| Category | Lost Zone |
| Type | Expedition |
| Region | Reaver Woods |
| Area | The Shrouded Woods |
Expedition: The Shrouded Woods is a Lost Zone expedition in Reaver Woods.
A shadow looms over the woods surrounding Deepwood Holt. The locals claim there are knives waiting in the dark, stalking all that dwells within. They whisper the word “Reaver”. Whatever the truth, this forest seems to be trapped in an interstice between our reality and the Gloom. It is time you found out why.
How to Unlock[edit]
Accessed during The Lost Colony
Rewards[edit]
| Echoes | ||
|---|---|---|
| Name | Quality | |
| Placeholder Echo | Any | |
| Materials | ||
|---|---|---|
| Name | Quality | |
| Common | ||
| Common | ||
| Common | ||
| Common | ||
| Common | ||
| Common | ||
| Rare | ||
| Rare | ||
| Rare | ||
| Rare | ||
| Rare | ||
| Rare | ||
| Accessories | ||
|---|---|---|
| Name | Quality | |
| Placeholder | ||
| Weapons | ||
|---|---|---|
| Name | Quality | |
| Placeholder | ||
| Armors | ||
|---|---|---|
| Name | Quality | |
| Placeholder | ||
| Style | ||
|---|---|---|
| Name | Quality | |
| Placeholder | ||
| Housing | ||
|---|---|---|
| Name | Quality | |
| Placeholder | ||
| Crafting | ||
|---|---|---|
| Name | Quality | |
| Placeholder | ||
Possible Treasure Chest types to spawn here:
Treasure Chests
Treasure Chests can be found across Evenor and within Lost Zones, and give various rewards.
Skeleton Chest

Skeleton Chests are a specific kind of treasure chest found in Lost Zone areas. These chests require a Skeleton Key to open.
Soulbound Chest

Soulbound chests, when approached, will lock themselves with green spectral chains and spawn enemies within a small radius in front of them. The chest will unlock once all soulbound enemies have been defeated, which are marked with chains glowing near their feet.
Enemies[edit]
Events[edit]
Altar of the Phoenix
The Altar of the Phoenix is an Event found in all Lost Zones. Interacting with the altar will summon a phoenix that must be defeated to earn rewards. The type of phoenix and mechanics of the event differ depending on the zone. It is possible that applying the Phoenix Eggs mutator (Greed + Solar) makes it more likely for the altar to appear in the Lost Zone.
The Woods Phoenix. After activating the altar, players must defeat The Woods Phoenix multiple times within two minutes, similar to the Loot Phoenix. However, The Woods Phoenix will respawn as two phoenixes on the first defeat. Defeating the two will respawn three phoenixes, and then three again. In total, The Woods Phoenix must be defeated nine times across four waves. Like the Loot Phoenix, each phoenix defeat will ignite one of the altar's rings. The event ends when the phoenix is defeated nine times or the timer expires.
Deception
The Deception is group of four chests. The goal of the event is to pick the two chests without deceivers hiding inside. Hints to those chests are:
- In the distance deceivers can be seen hiding in their chests
- Close by the deceiver chests can move around
Failing means to confront both deceivers in combat.
Gloom Ambush
A Gloom ambush will always occur at least once during a Lost Zone expedition and, in most cases, cannot be bypassed. The ambush takes place in certain rooms which will have a Memory Fragment in the center. Picking up or passing the fragment will seal the exits and initiate the event. Players outside of the ambush can pass through the one-way barriers into the room.
Loot Goblin
The Loot Goblin is a special enemy unique to its own event in a Lost Zone. The Loot Goblin is a goblin toting a large overflowing treasure chest on its back, and it is always first encountered rummaging through an already opened treasure chest with a pile of treasure in front of it. Defeat the goblin before it escapes, and its spoils are yours for the taking. As the Loot Goblin is an icon of greed and avarice, it is arguably more likely it will appear if applying a Greed Imbuement to the Lost Zone.
Trickster Events
Trickster events are found in all Lost Zones. There are 3 variants of these luck based mini games. A player can interact with Trickster's Game multiple times per encounter. All variants share, that the wayfinder has a limited amount of attempts to get the grand price, various loot and some of the Trickster's Coins. Group members can either get the same price by staying in close proximity while the game is played, or simply open the last chest for free at a later time.
Crown of Decay
The Crown of Decay may be found throughout the three Reaver Woods expeditions. It is started by finding a spectral crown on a small altar in the woods. Accepting it gives the wearer a buff and a count of enemies slain, but it also vastly expands the wearer's aggro radius, immediately taunting enemies to attack the owner of the crown. If the owner of the crown is defeated for any reason, the quest fails. Completing the quest involves handing the crown over to the "rightful king" - a large statue of the old king's head. See the attached picture.
Fighting Pit
The Fighting Pit may be found throughout the three Reaver Woods expeditions. Igniting the effigy in the inner fort challenges the Reavers to a fight and the entrances close, trapping the Wayfinder inside.
Monsters and named bosses are variable and depend on the expedition. The fort can be entered but not exited during the fight through a drop in the outer palisades. Ending the fight opens the entrances again.
Gloom Stronghold
The Event does only once show up as an event quest. Later houses can be cleared without the quest.
The ruined houses can have different layouts, but the lineup is very similar. Reach the top of the ruin to attack the large gloom plant. Once the main plant on top is removed, a barrier further down will open and a treasure room becomes accessible.
The smaller plants also contain Memory Fragments and are worth the effort. They might be hidden within or near the ruin. Some of the climbs might be difficult to manage without a good technique in Double Jump.
Sword Shrine
The Sword Shrine may be found throughout the three Reaver Woods expeditions. Sacrificing an imbuements summons waves of enemies which must be defeated in time. Monsters and named extra enemies are variable and depend on the imbuement.
