Expedition: Repository of Knowledge
| Expedition: Repository of Knowledge | |
|---|---|

| |
| Category | Lost Zone |
| Type | Expedition |
| Region | Aurelian |
| Area | The Repository of Knowledge |
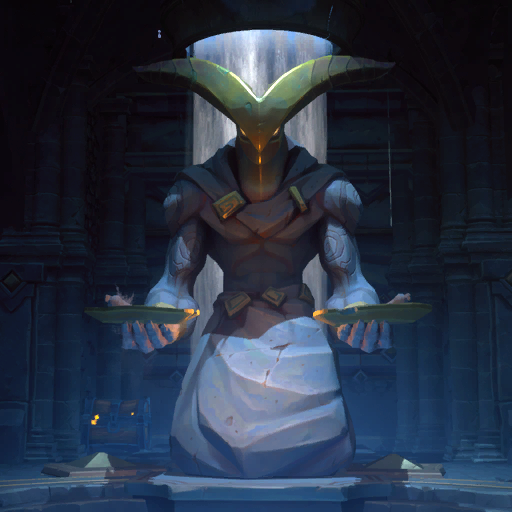
Expedition: Repository of Knowledge is a Lost Zone expedition in Aurelian.
You've reached the heart of Aurelian—the Repository of Knowledge. Here the monks performed experiments that have bound this place to the Gloom. Can you unlock their secrets?
How to Unlock[edit]
Accessed during Duality
Rewards[edit]
| Echoes | ||
|---|---|---|
| Name | Quality | |
| See Enemy List Below | Any | |
| Materials | ||
|---|---|---|
| Name | Quality | |
| Common | ||
| Common | ||
| Common | ||
| Common | ||
| Common | ||
| Common | ||
| Epic | ||
| Placeholder | ||
| Placeholder | ||
| Placeholder | ||
| Placeholder | ||
| Placeholder | ||
| Placeholder | ||
| Placeholder | ||
| Placeholder | ||
| Placeholder | ||
| Placeholder | ||
| Placeholder | ||
| Placeholder | ||
| Placeholder | ||
| Placeholder | ||
| Placeholder | ||
| Rare | ||
| Rare | ||
| Rare | ||
| Rare | ||
| Rare | ||
| Accessories | ||
|---|---|---|
| Name | Quality | |
| Placeholder | ||
| Weapons | ||
|---|---|---|
| Name | Quality | |
| Common | ||
| Common | ||
| Common | ||
| Common | ||
| Common | ||
| Common | ||
| Common | ||
| Common | ||
| Armors | ||
|---|---|---|
| Name | Quality | |
| Placeholder | ||
| Potions | ||
|---|---|---|
| Name | Quality | |
| Placeholder | ||
| Placeholder | ||
| Placeholder | ||
| Placeholder | ||
| Placeholder | ||
| Placeholder | ||
| Style | ||
|---|---|---|
| Name | Quality | |
| Placeholder | ||
| Housing | ||
|---|---|---|
| Name | Quality | |
| Placeholder | ||
Possible Treasure Chest types to spawn here:
Treasure Chests
Treasure Chests can be found across Evenor and within Lost Zones, and give various rewards.
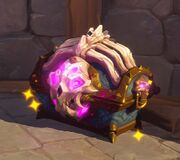
Skeleton Chest

Skeleton Chests are a specific kind of treasure chest found in Lost Zone areas. These chests require a Skeleton Key to open.
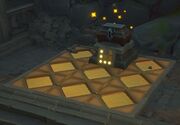
Grid Chest

Chests found in Aurelian Lost Zones. The eight panels surrounding the chest will light up when stepped on, and will deactivate when stepped on again. To unlock the chest, the lit panels must match the small display under the chest.
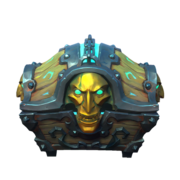
Soulbound Chest

Soulbound chests, when approached, will lock themselves with green spectral chains and spawn enemies within a small radius in front of them. The chest will unlock once all soulbound enemies have been defeated, which are marked with chains glowing near their feet.
Enemies[edit]
 Codex Initiate
 Codex Monk
 Codex Sage
 Archon
 Archon Elite
 Archon Commander
 Cryptographer
 Ichor
Ichor Ichorling
 Silk Mistress
 Broodhunter
 Broodspawn
 Seer
Seer Oracle
 Herald
 Husk
Husk Wretch
 Foul Wretch
 Emissary
 Prophecy
 Foreboding Prophecy
 Loot Goblin
 Phoenix
 Silk-Seer Esharaa
 Shuul Baelhorn
 Vaelor's Blood
 The Highlands Horror
 Rivenmaw
 Commander Rigor
Events[edit]
Altar of the Phoenix
The Altar of the Phoenix is an Event found in all Lost Zones. Interacting with the altar will summon a phoenix that must be defeated to earn rewards. The type of phoenix and mechanics of the event differ depending on the zone. It is possible that applying the Phoenix Eggs mutator (Greed + Solar) makes it more likely for the altar to appear in the Lost Zone.
Deception
The Deception is group of four chests. The goal of the event is to pick the two chests without deceivers hiding inside. Hints to those chests are:
- In the distance deceivers can be seen hiding in their chests
- Close by the deceiver chests can move around
Failing means to confront both deceivers in combat.
Gloom Ambush
A Gloom ambush will always occur at least once during a Lost Zone expedition and, in most cases, cannot be bypassed. The ambush takes place in certain rooms which will have a Memory Fragment in the center. Picking up or passing the fragment will seal the exits and initiate the event. Players outside of the ambush can pass through the one-way barriers into the room.
Loot Goblin
The Loot Goblin is a special enemy unique to its own event in a Lost Zone. The Loot Goblin is a goblin toting a large overflowing treasure chest on its back, and it is always first encountered rummaging through an already opened treasure chest with a pile of treasure in front of it. Defeat the goblin before it escapes, and its spoils are yours for the taking. As the Loot Goblin is an icon of greed and avarice, it is arguably more likely it will appear if applying a Greed Imbuement to the Lost Zone.
Trickster Events
Trickster events are found in all Lost Zones. There are 3 variants of these luck based mini games. A player can interact with Trickster's Game multiple times per encounter. All variants share, that the wayfinder has a limited amount of attempts to get the grand price, various loot and some of the Trickster's Coins. Group members can either get the same price by staying in close proximity while the game is played, or simply open the last chest for free at a later time.
A Matter of Time
Hourglasses may be found throughout the Lost Zone. Picking up any hourglass will begin the event and initiate a 5 minute countdown. Players must find four hourglasses within the time limit and return them to the mechanisms surrounding the chest. Once returned, the timer is cleared and the chest unlocks. If the event is failed, collected hourglasses will be kept and can be used in repeat events.
Equilibrium
The Equilibrium device is located in a unique intersection room located between two other rooms. In the center is the device, with one side shrouded in shadow and the other bathed in light.
Facsimile
The event is located in The Broken Light, a hall with staircases leading down to an open arena with a large, ornate machine overhead. Balconies overlook the arena along with four stones statues on the edges. Data fragments can be brought to this light to initiate the facsimile machine. On the sidelines are three alcoves sealed by radiant energy: two housing Memory Fragments, and one with a large Treasure Chest and a facsimile terminal.
Gelatinous Cube
Gelatinous Cubes are interactive Events found exclusively in Aurelian Lost Zones. They can be broken to reveal the contents within:
- A Treasure Chest of random size
- Encoded Tracers or a random Data Fragment
- Ichor grows from the cube's remains:
- Three Ichorlings
- A single Ichor
- Rarely, Vaelor's Blood may spawn
In addition, an Unyielding Cube may be rewarded when destroying the cube.
Tracer
Tracer devices can be found randomly through out the Aurelian ruins. Upon activation, the device will rise from the ground and begin its defense system.
The tracer will spawn enemies in waves, typically consisting of a few weak enemies like Goblin Scavengers, Broodspawns, and Ichorlings. In the Undercroft and Repository, Codex Initiates and Codex Monks may appear. Known enemies include:
- Goblin Scavengers
- Goblin Hunters
- Goblin Hackers
- Goblin Seers
- Broodspawns
- Broodhunters
- Ichorlings
- Ichors
- Codex Initiates
- Codex Monks
After defeating all waves, the device will open to reward the data within.
